Auto-EQ
The Auto EQ feature automatically adjusts an EQ to match a specified target curve. It is not designed to replace your ears! In the end you decide what sounds best. It is just a tool, use it wisely.
Warning: This feature is still work in progress
Requirements
- Measurement mic
- Spare channel
Usage
- Make sure to disable / reset any EQ applied to the PA.
- Connect the measurement mic to a free channel.
- Select
Auto EQfrom the main menu to display the "Measure" page as shown below.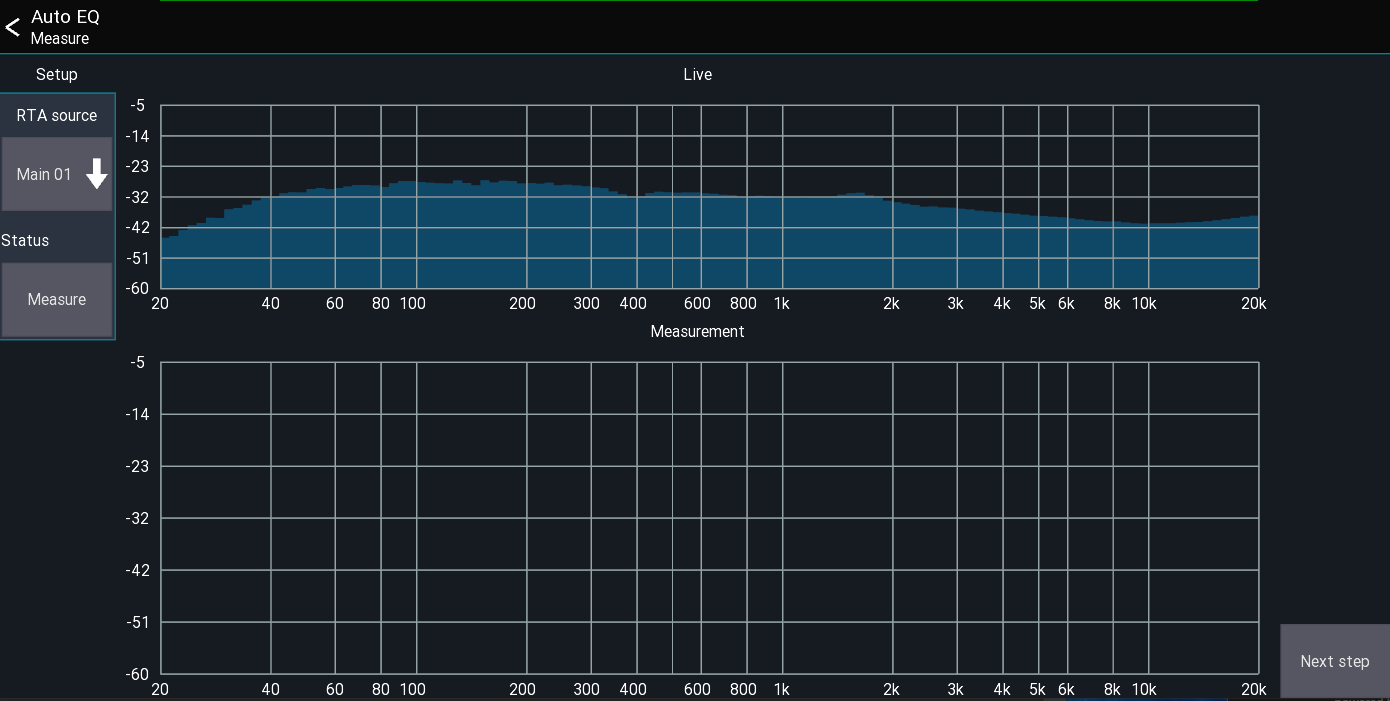
- Select the measurement mic's channel. The RTA of the mic is then shown at the top of the screen.
- Start pink noise at roughly the level you will be playing.
- Press
Measure. The measurement takes ~3-5 seconds. - Press
Nextto continue to the reference setup page as shown below. Here you can configure how the system is calibrated.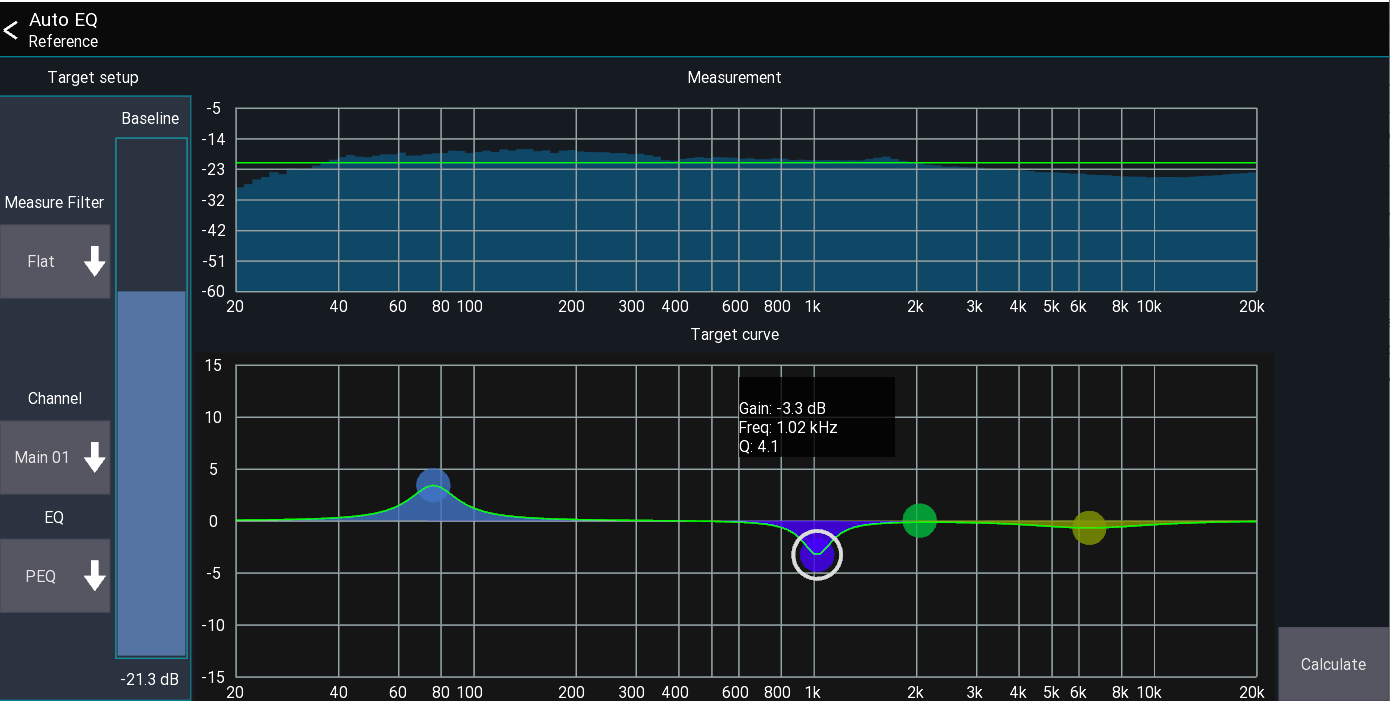
- Use the
Baselineslider to adjust the green0 dBline. Everything below this line is assumed to be "too quiet"; everything above it "too loud". - Select the channel the EQ should be applied to, and the type of EQ control that should be used. PEQ usually gives better results than GEQ.
- The
Target curvecan be used to apply personal preferences to the calibration - for example, to have more bass, or more mids. In the above screenshot, I want a little more bass and less signal at 1kHz. - Press
Nextto calculate the resulting EQ as shown below.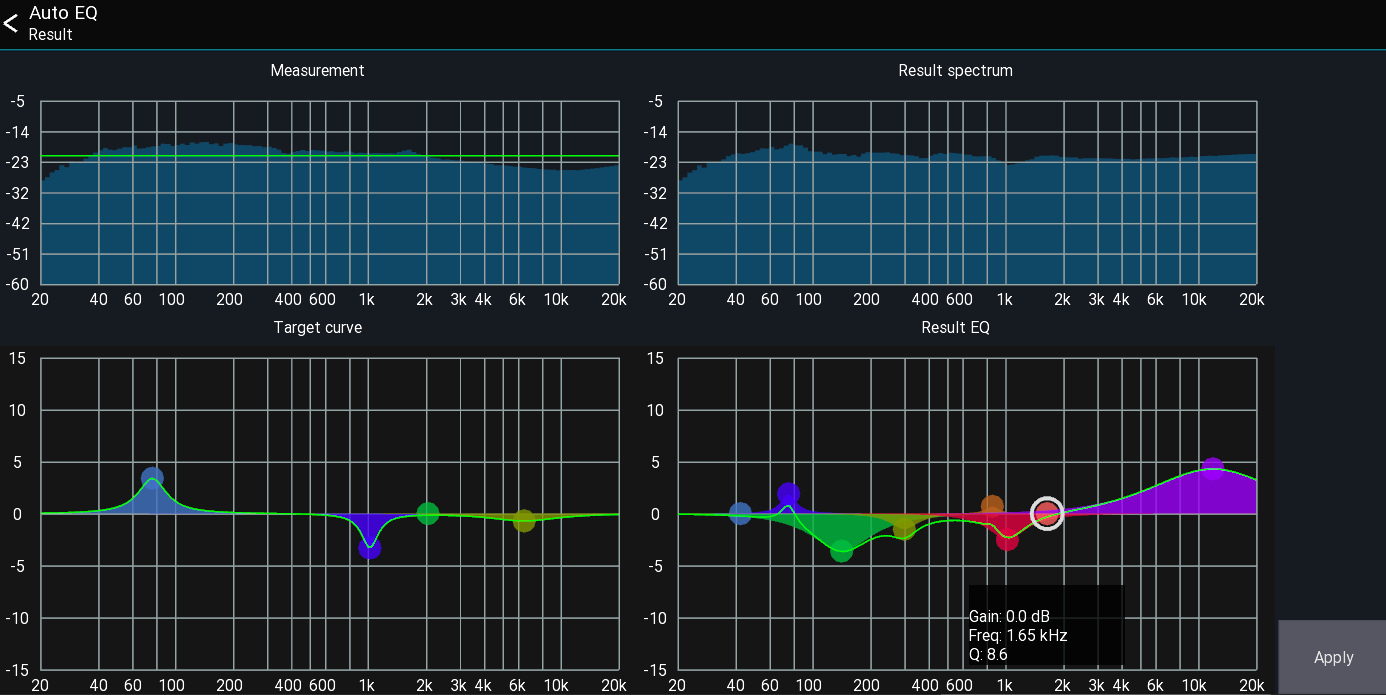
- The result is displayed bottom right. You can make manual adjustments to the EQ before pressing
Applyto apply it to the channel. - An estimate of the resulting spectrum is shown top right. In the above example you can see that the app is trying to reduce the signal at 50-350Hz as it was above the green baseline. The highs gets boosted because they were below the baseline in the measurement.
Warning: This feature is still a work in progress